Set up an Azure app for Entra ID authentication
This page explains how an administrator creates an app registration in Azure so that Azure OpenAI or Microsoft Foundry can be used with Entra ID authentication.
The information from the created app registration is used in Agentiqs AI provider settings and when users verify their connection.
- An app registration in Microsoft Entra ID
- Delegated permissions for Microsoft Cognitive Services
- A redirect URI used for authentication from Agentiqs
The screens may change if Microsoft updates the product.
Overall flow
To use Entra ID authentication, complete the following steps and then roll out the information to Agentiqs users.
| Step | Summary | Performed by |
|---|---|---|
| 1 | Register an application | A person who is allowed to create an app registration in Microsoft Entra ID |
| 2 | Grant permissions to users in Azure | A person with Microsoft Azure administrative privileges |
| 3 | Share the app information with the Agentiqs administrator | A person who can create an app registration in Microsoft Entra ID |
| 4 | Distribute the information needed by Agentiqs users | Agentiqs administrator |
| 5 | Connect using Entra ID authentication | Agentiqs user |
Register the application
-
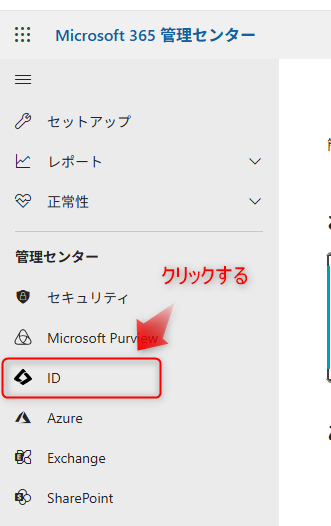
Log in to the Microsoft 365 admin center with a Microsoft account, then click [Admin centers] > [Identity] from the side navigation.
-
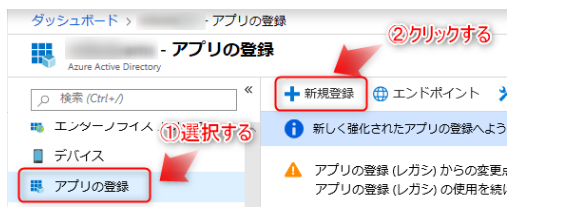
Choose [Manage] > [App registrations], then click [New registration].
-
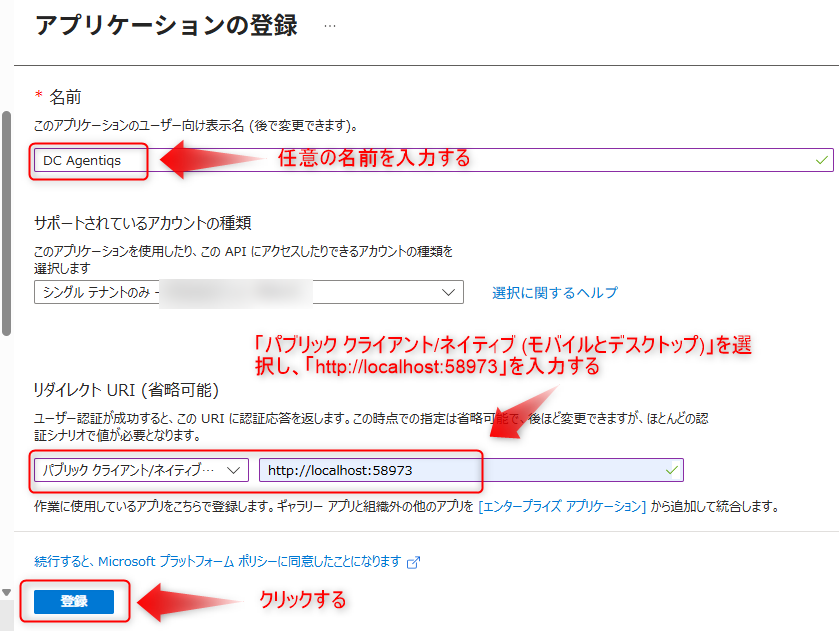
Enter the application registration details and register it.
 info
infoThe Application (client) ID displayed after registration is used when connecting to Entra ID from Agentiqs.
Keep it so you can share it with the user or the AI provider settings administrator.
Create a client secret
-
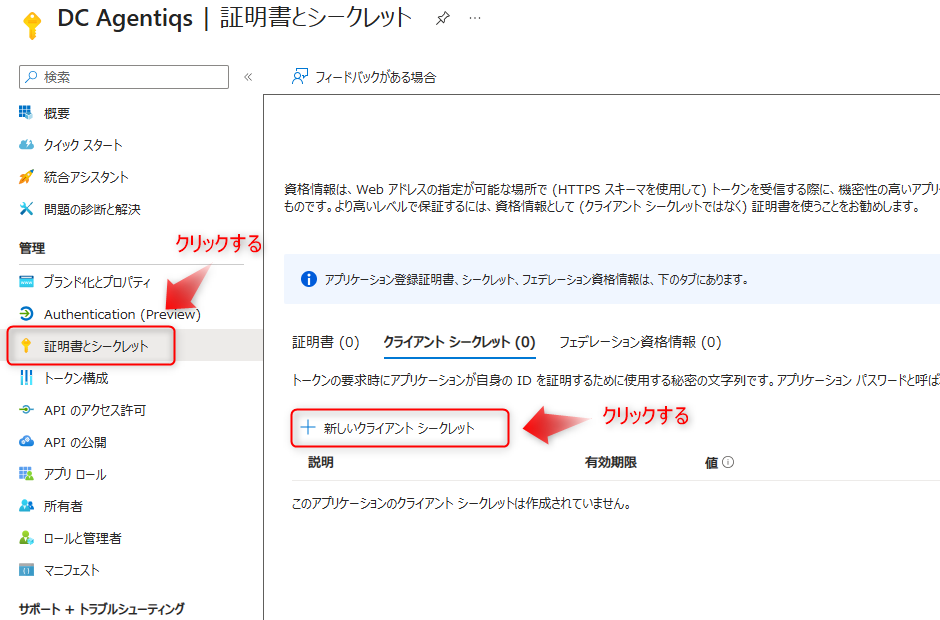
Open [Manage] > [Certificates & secrets], then click [New client secret].
-
Set the description and expiration, then click [Add].
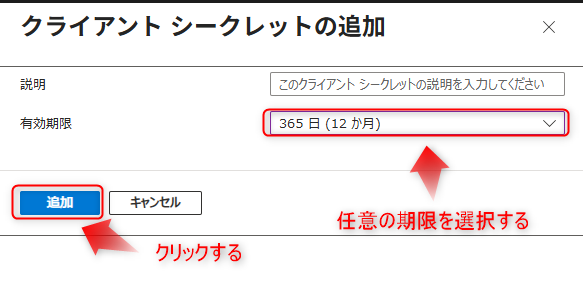 caution
Client secrets have an expiration date. If the secret expires, the connection will stop working, so manage the renewal schedule carefully.
Add API permissions
-
Select [API permissions], then click [Add a permission].
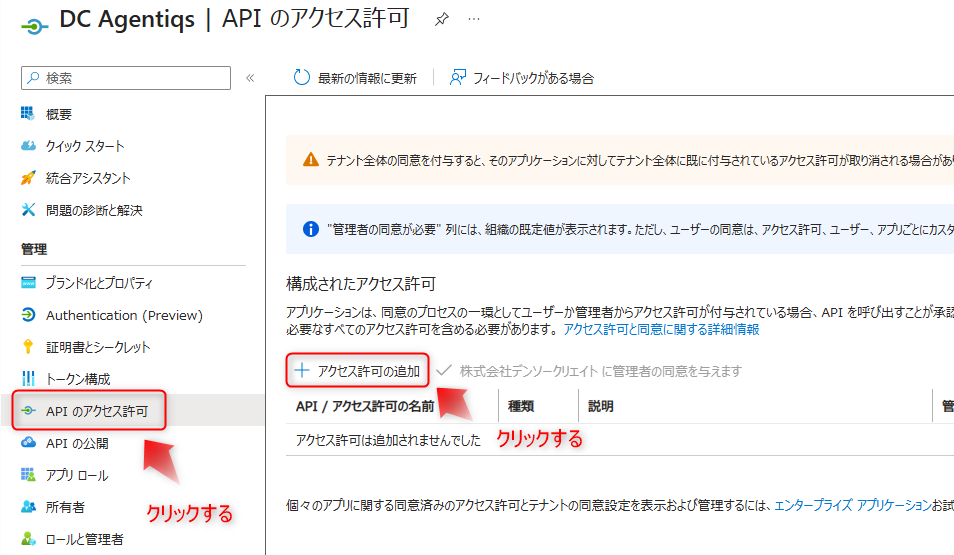
-
Select [APIs my organization uses], enter
Microsoft Cognitive Servicesin the search filter, and choose the service.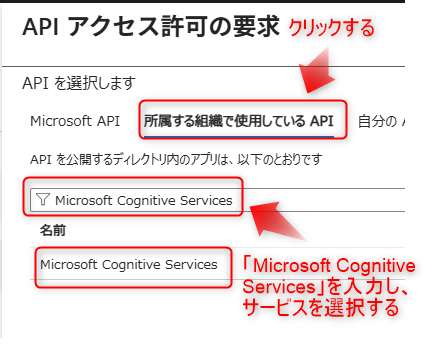
-
Select [Delegated permissions], check
user_impersonation, and click [Add permissions].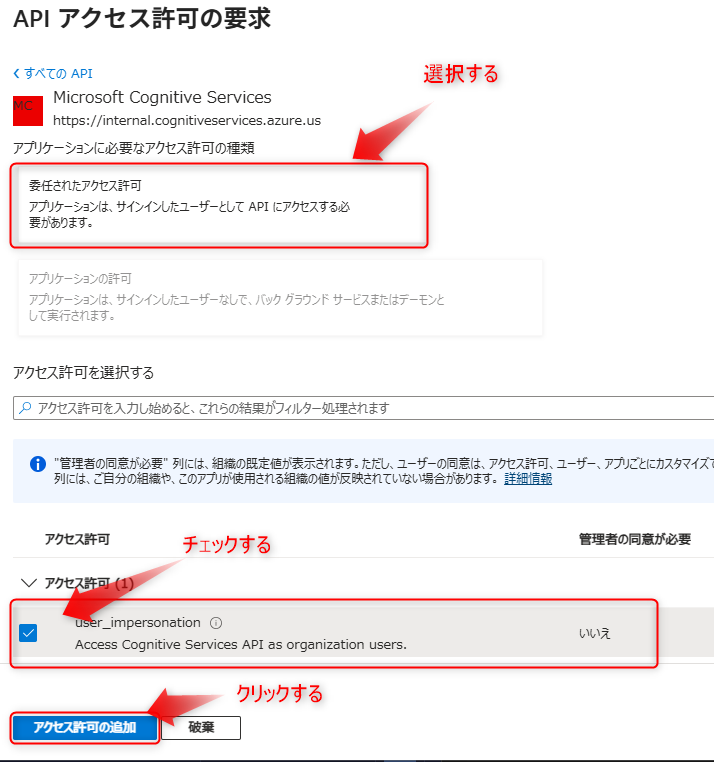
Add a redirect URI
-
Open [Manage] > [Authentication (Preview)], then click [Add a platform].
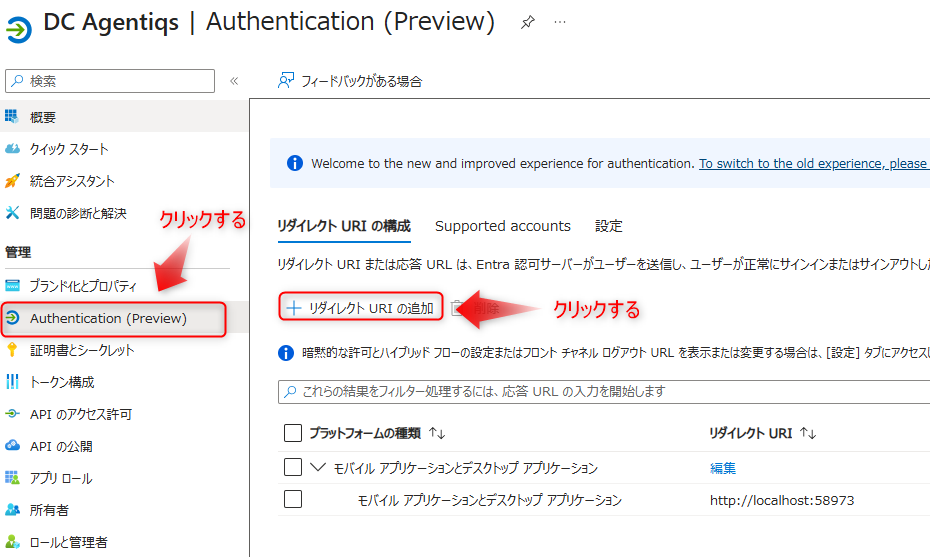
-
Select [Mobile and desktop applications].
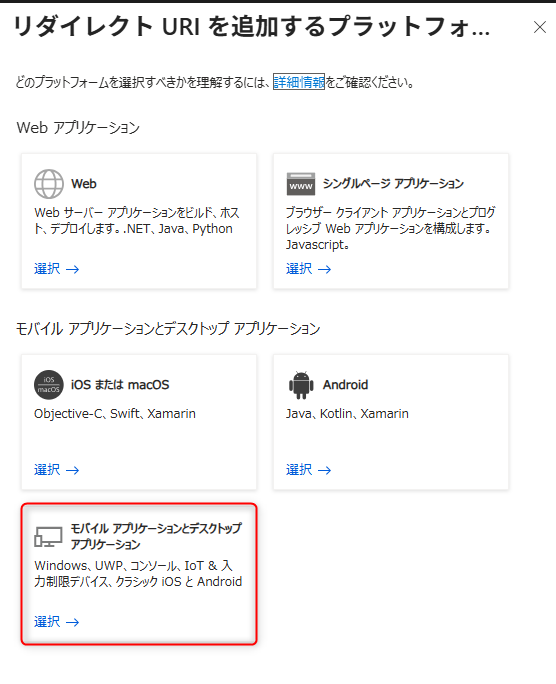
-
Enter the following redirect URI and click [Configure].
http://localhost:59073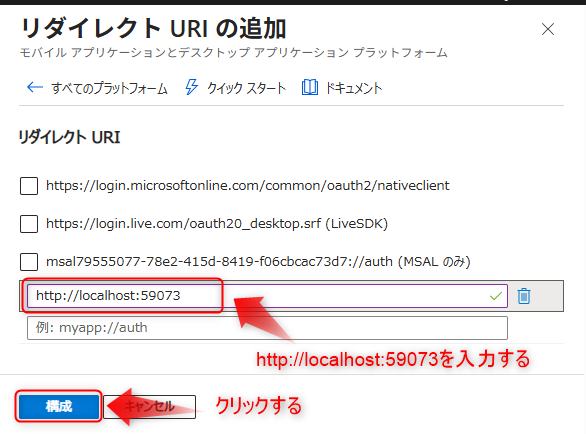
-
Confirm that the redirect URI has been added on the [Authentication (Preview)] screen.
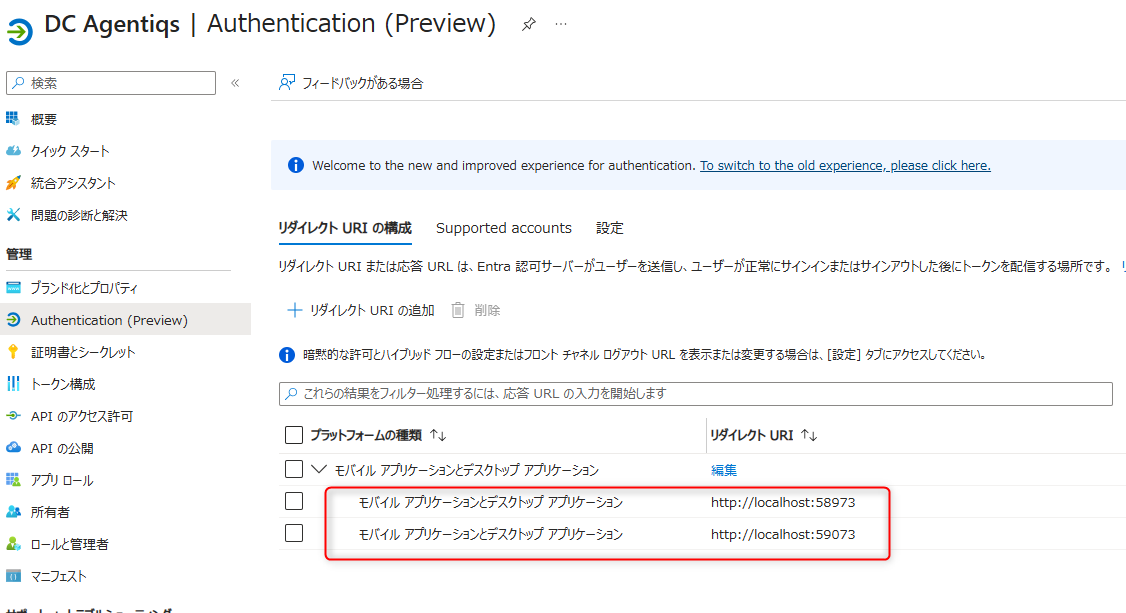
Grant permissions to users in Azure
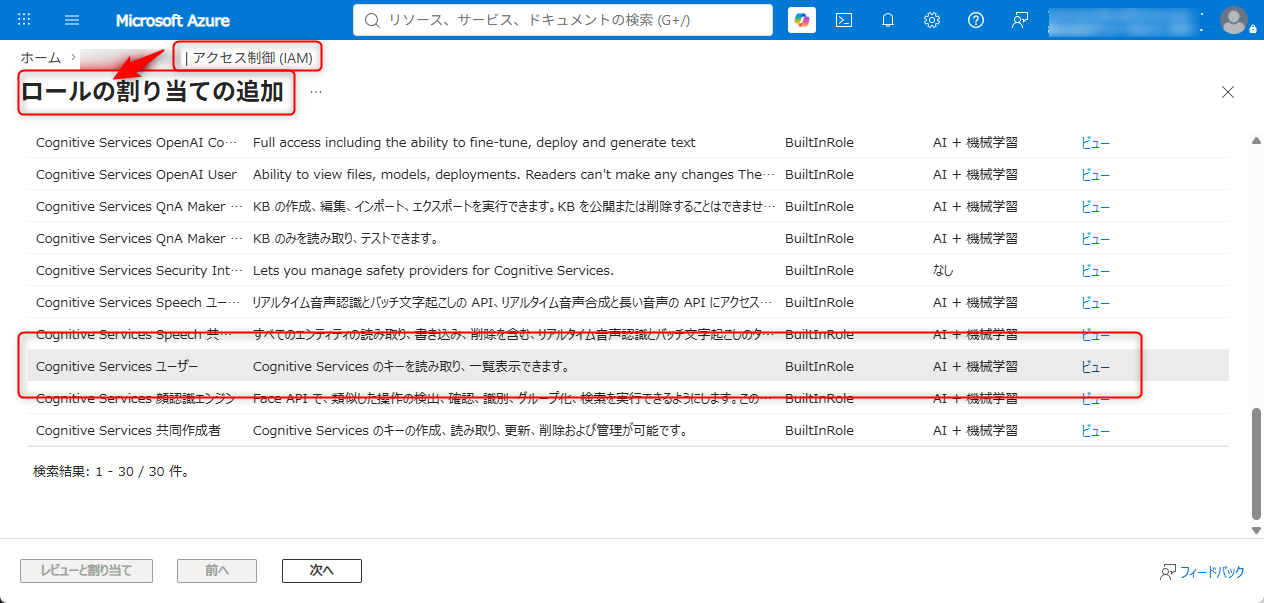
For the target Microsoft Foundry or Azure OpenAI resource, grant the following role to the user or user group:
Cognitive Services User
For detailed steps, see the Microsoft documentation: Add role assignment to an Azure OpenAI resource.
The actual configuration screen is shown below.
Share the app information with the Agentiqs administrator
The Microsoft Entra ID administrator shares the following information with the Agentiqs administrator:
- The "Application (client) ID" of the created application
Distribute the information needed by Agentiqs users
The Agentiqs administrator provides the following information:
- Application (client) ID
- Setup guide link: "Configure the AI provider - Connect with Entra ID authentication"