Learn the Basic Operations
This page explains how to use the integration features between Next Design and Agentiqs, including how AI agents retrieve and edit models and create metamodels.
Goal of This Guide
Through the following operations, you will use the basic integration features between Next Design and Agentiqs.
- Generate models with an AI agent
- Perform reviews across models
- Create a metamodel
When using this in development, you need to prepare an AI agent, including its system prompt.
This page helps you learn the basic operations for integration with Next Design.
Prerequisites
Use this page in the following environment.
- Agentiqs: V1.1 or later
- Next Design: V5 or later
- If you do not use the chat pane, integration is also possible with V4.
For details, see Next Design Help: Development Using AI.
- If you do not use the chat pane, integration is also possible with V4.
- Embedded Software Development Sample
- It is stored in the sample data as "Next Design Sample Data." See How to Set Up the Sample Data Environment.
- Use it if you want to perform the same operations as in this tutorial.
1. Prepare to Use Next Design and Agentiqs Together
1-1. Create an AI Agent
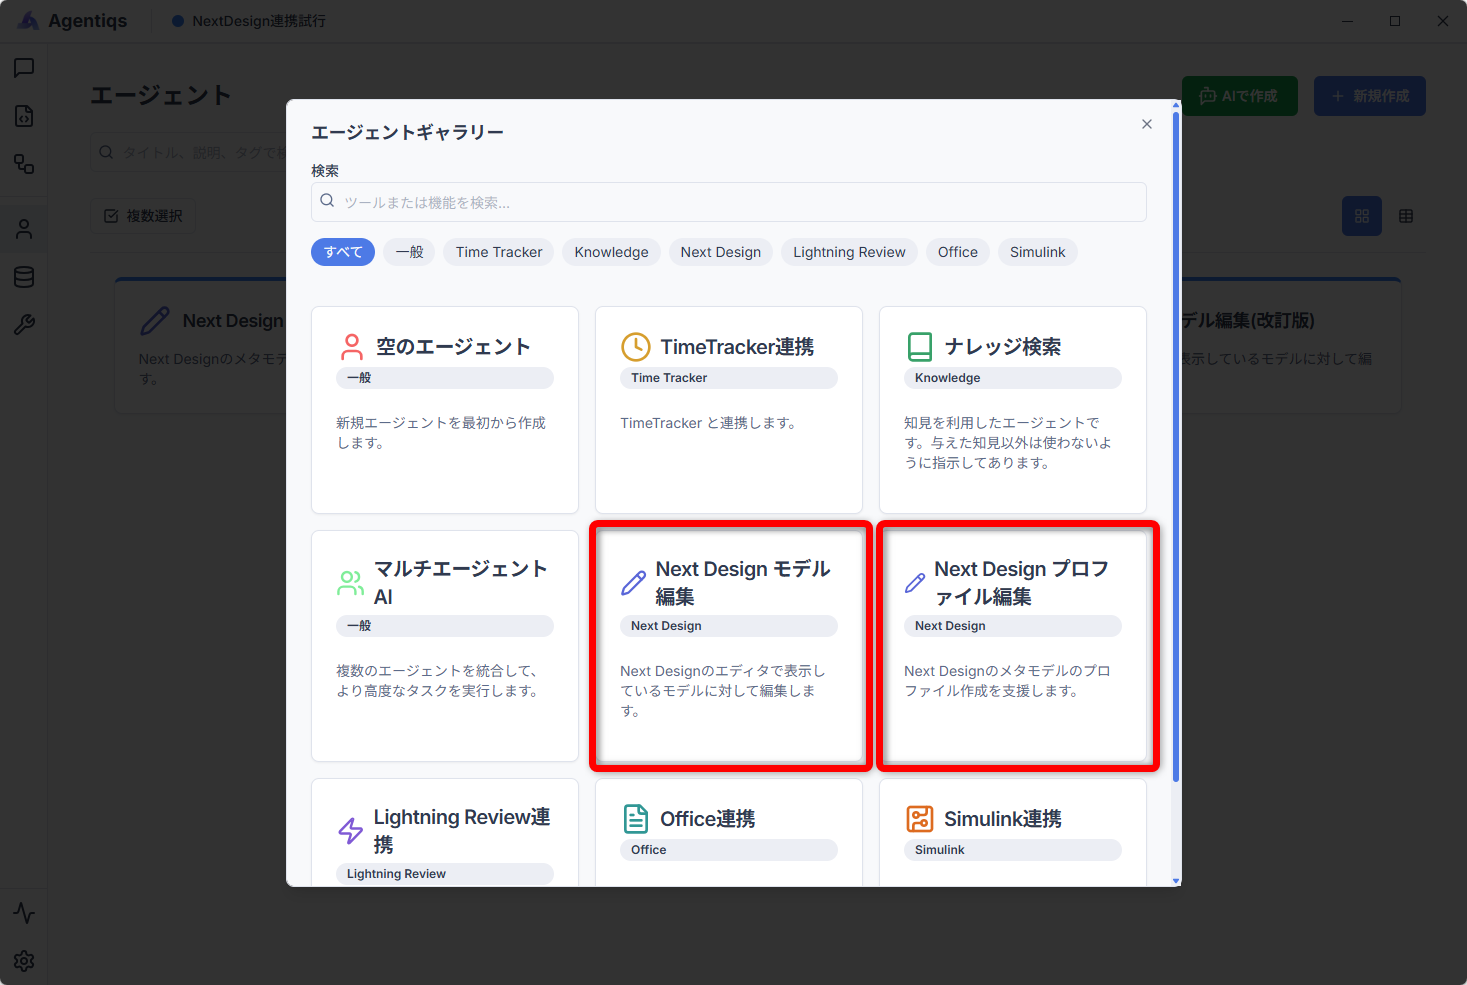
Create an AI agent for Next Design integration in Agentiqs.
From [Create New], add the following two tools.
| Tool | Purpose |
|---|---|
NextDesign Model Editing | Retrieve, generate, and edit models |
NextDesign Profile Editing | Edit metamodels (profiles) |
1-2. Start Next Design and Open the Chat Pane
-
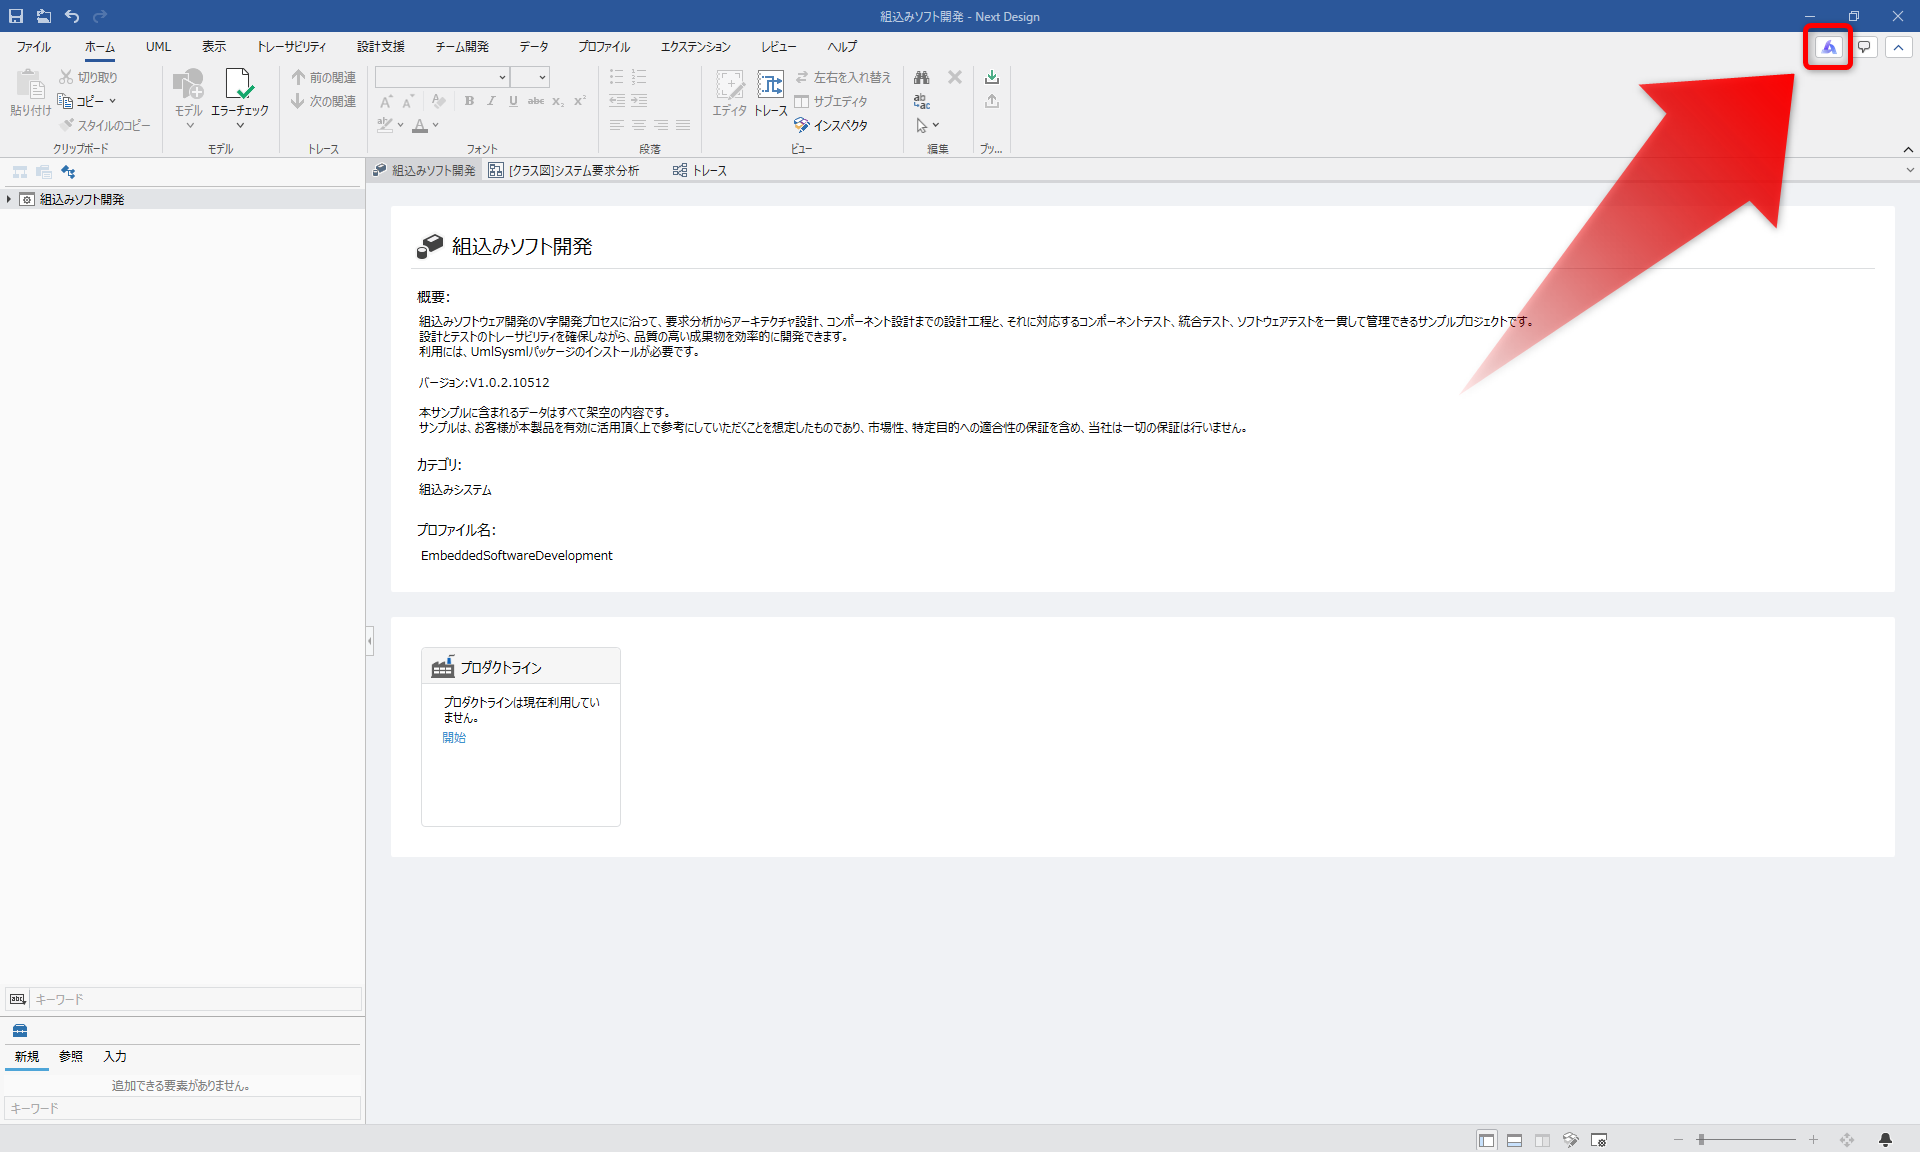
Start Next Design and open any project.
-
Click the Agentiqs icon in the upper-right corner of the screen to open the chat pane.
 info
infoIn the Agentiqs chat pane, you can retrieve and edit Next Design model data.
-
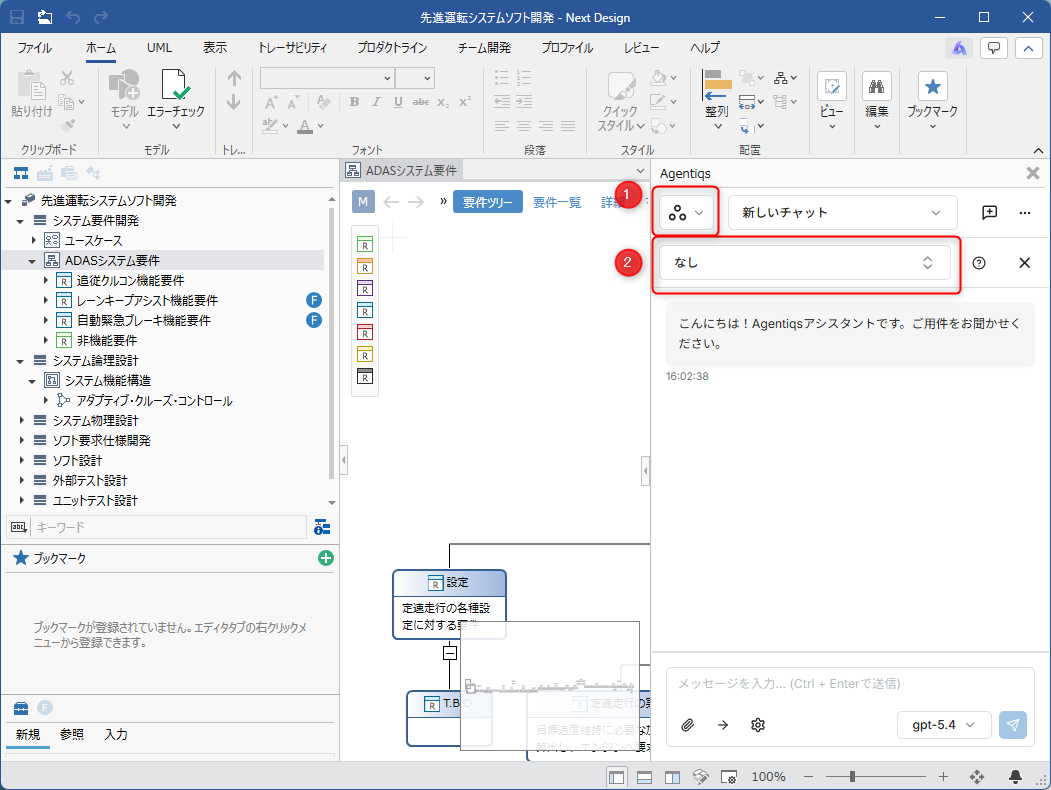
Specify the workspace (① below) and select the AI agent to use (②).
2. Use Models as Input Data
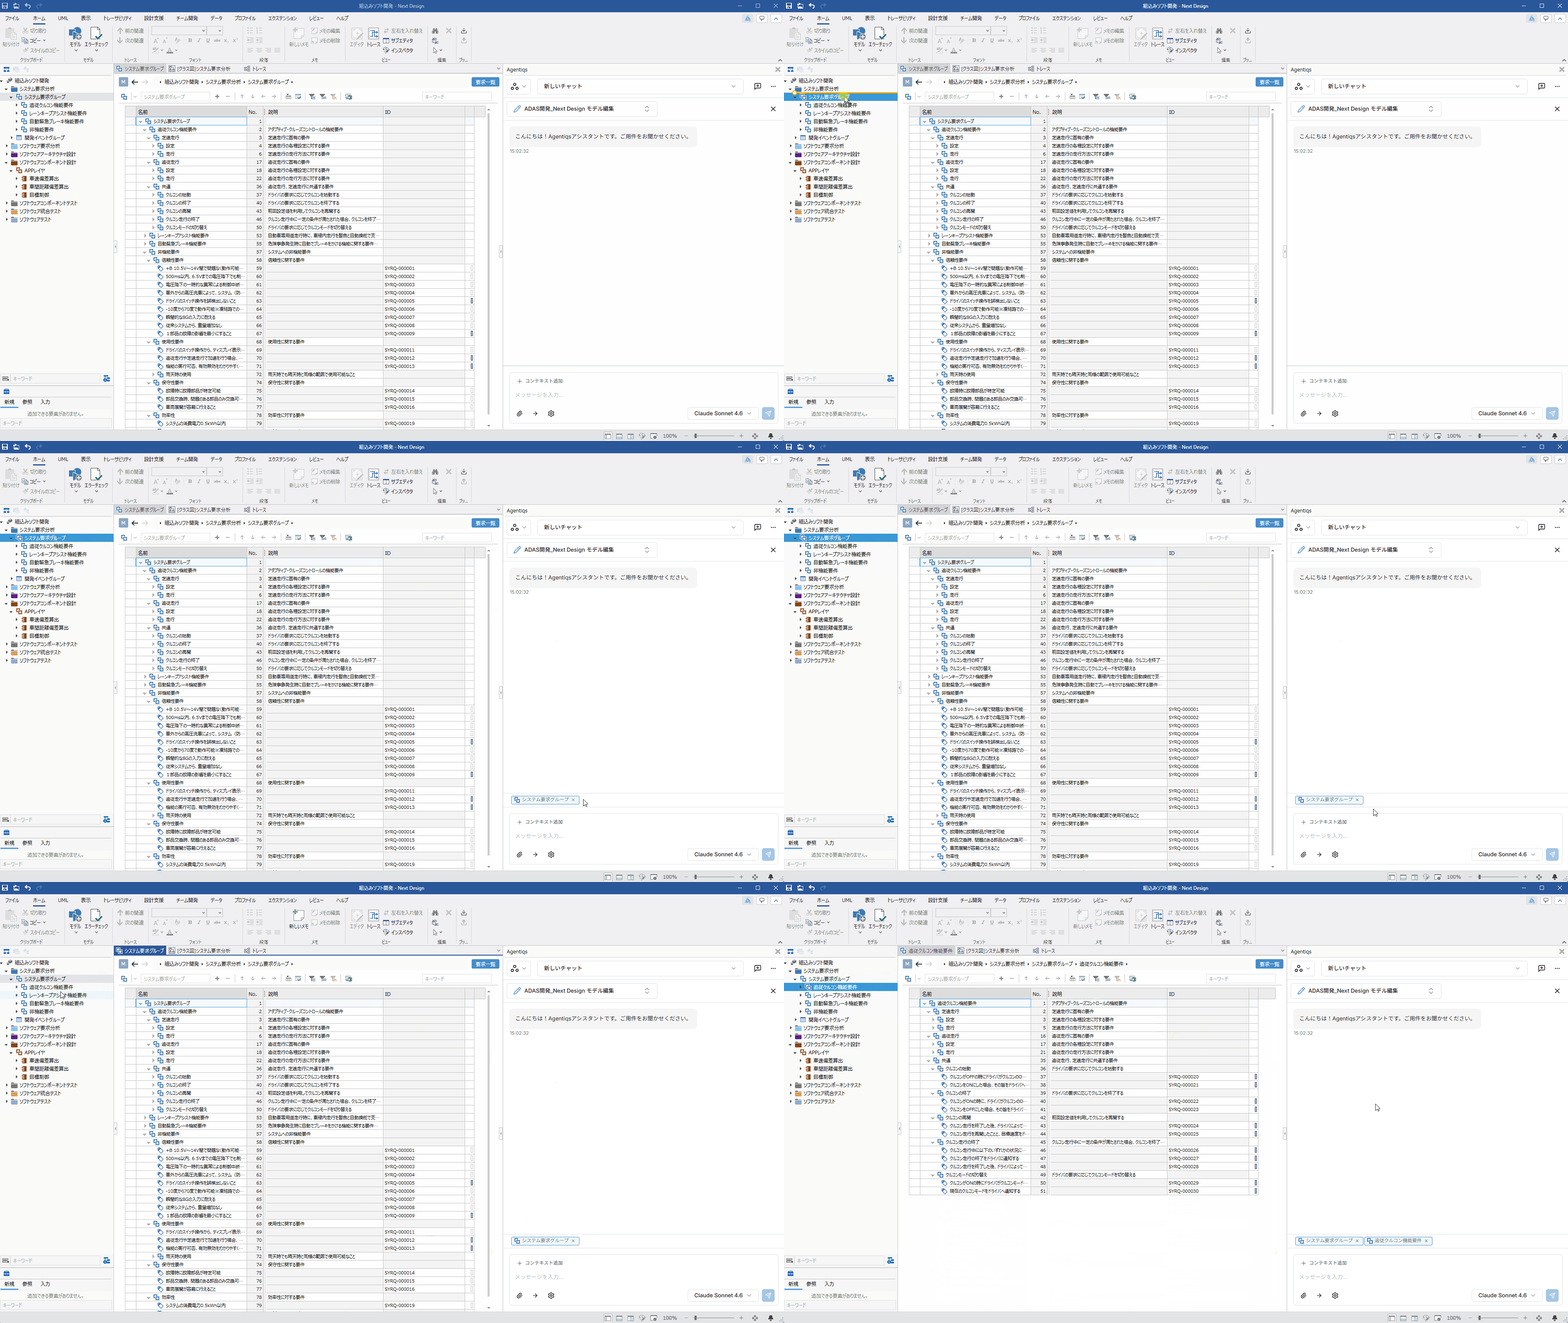
In the Agentiqs chat pane, you can pass Next Design models to an AI agent by drag and drop.
2-1. Use a Single Model as Input
Select the target model and drag and drop it into the chat pane.
The information of the selected model is passed to the AI agent as input data.
2-2. Pass Everything Including Child Elements
By dragging and dropping while holding down the Ctrl key, you can pass all elements under the selected model as input data.
The data is compressed to avoid exceeding the token limit, but if you pass too many models all at once, a token error may still occur.
3. Generate Models
Use an AI agent to generate models in Next Design.
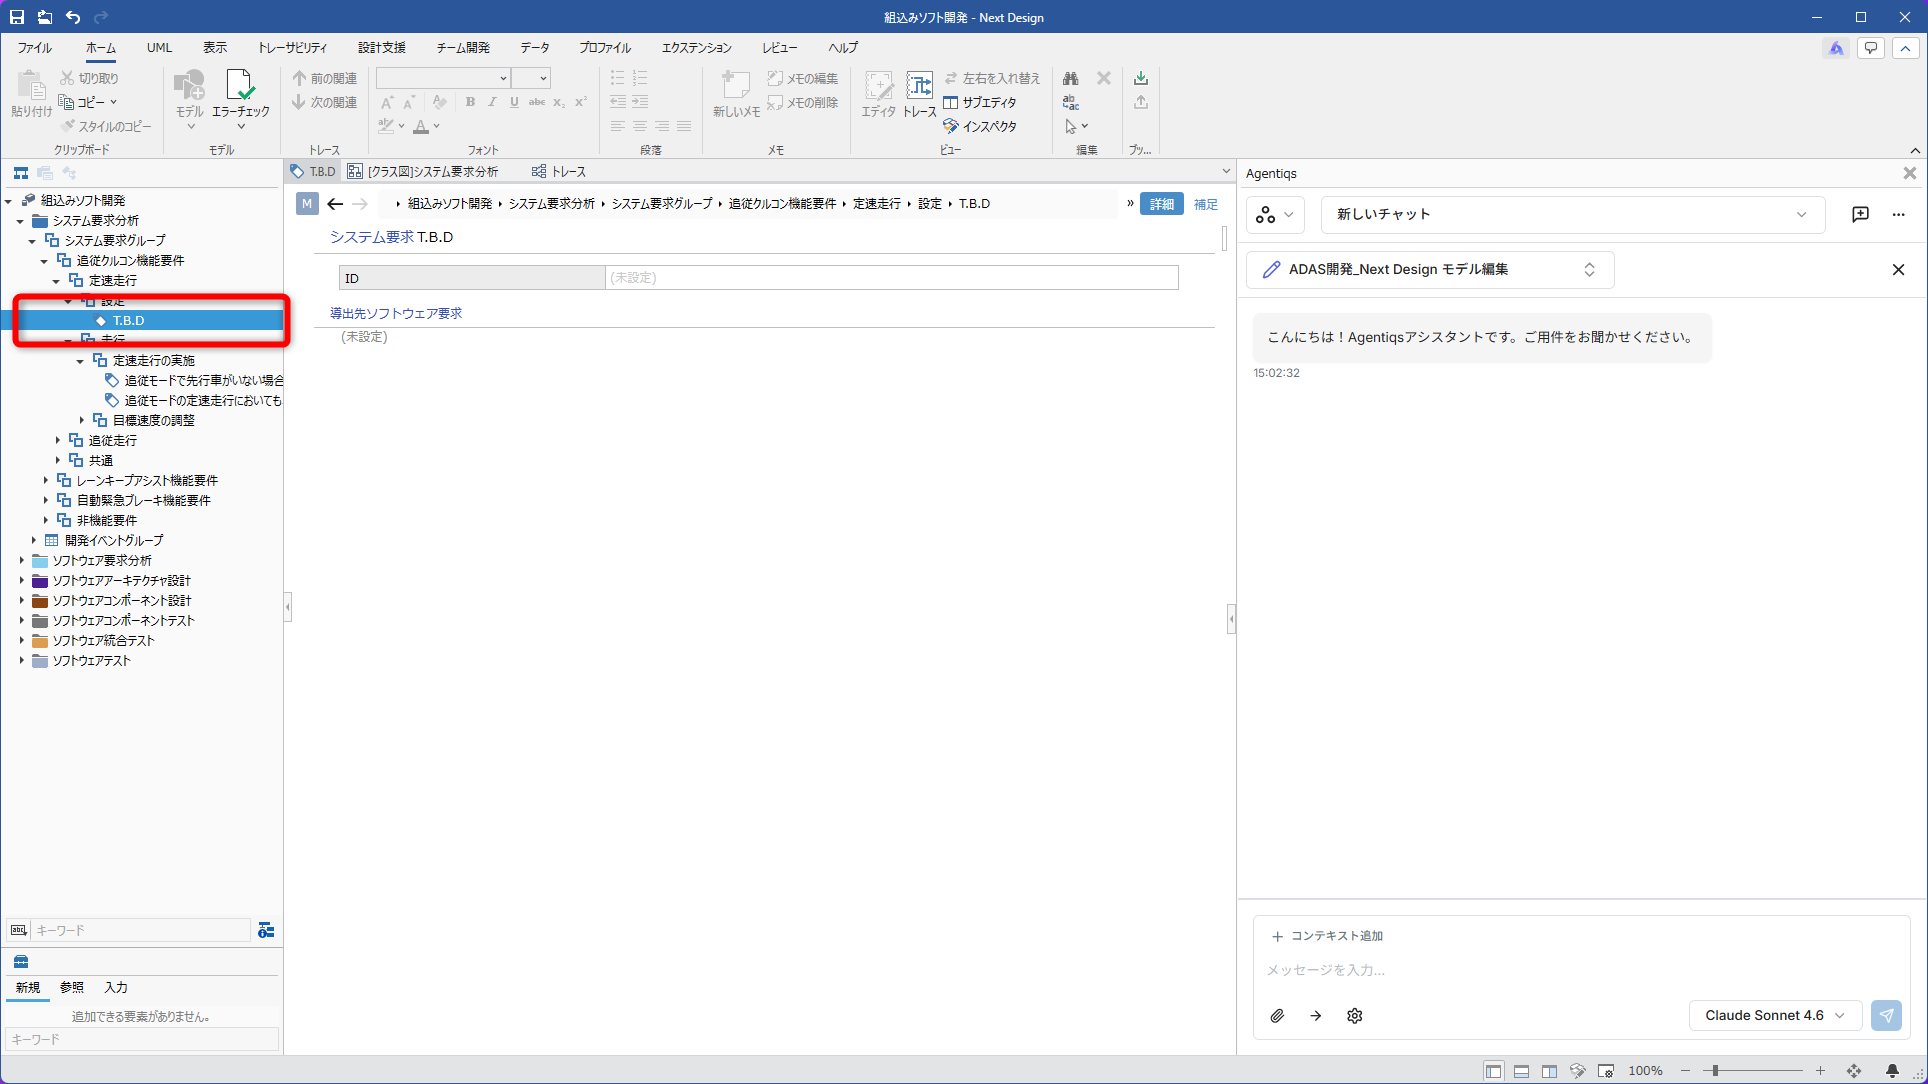
In this example, as shown in the figure below, focus on the models marked as TBD under the [Settings] model in system requirements analysis.
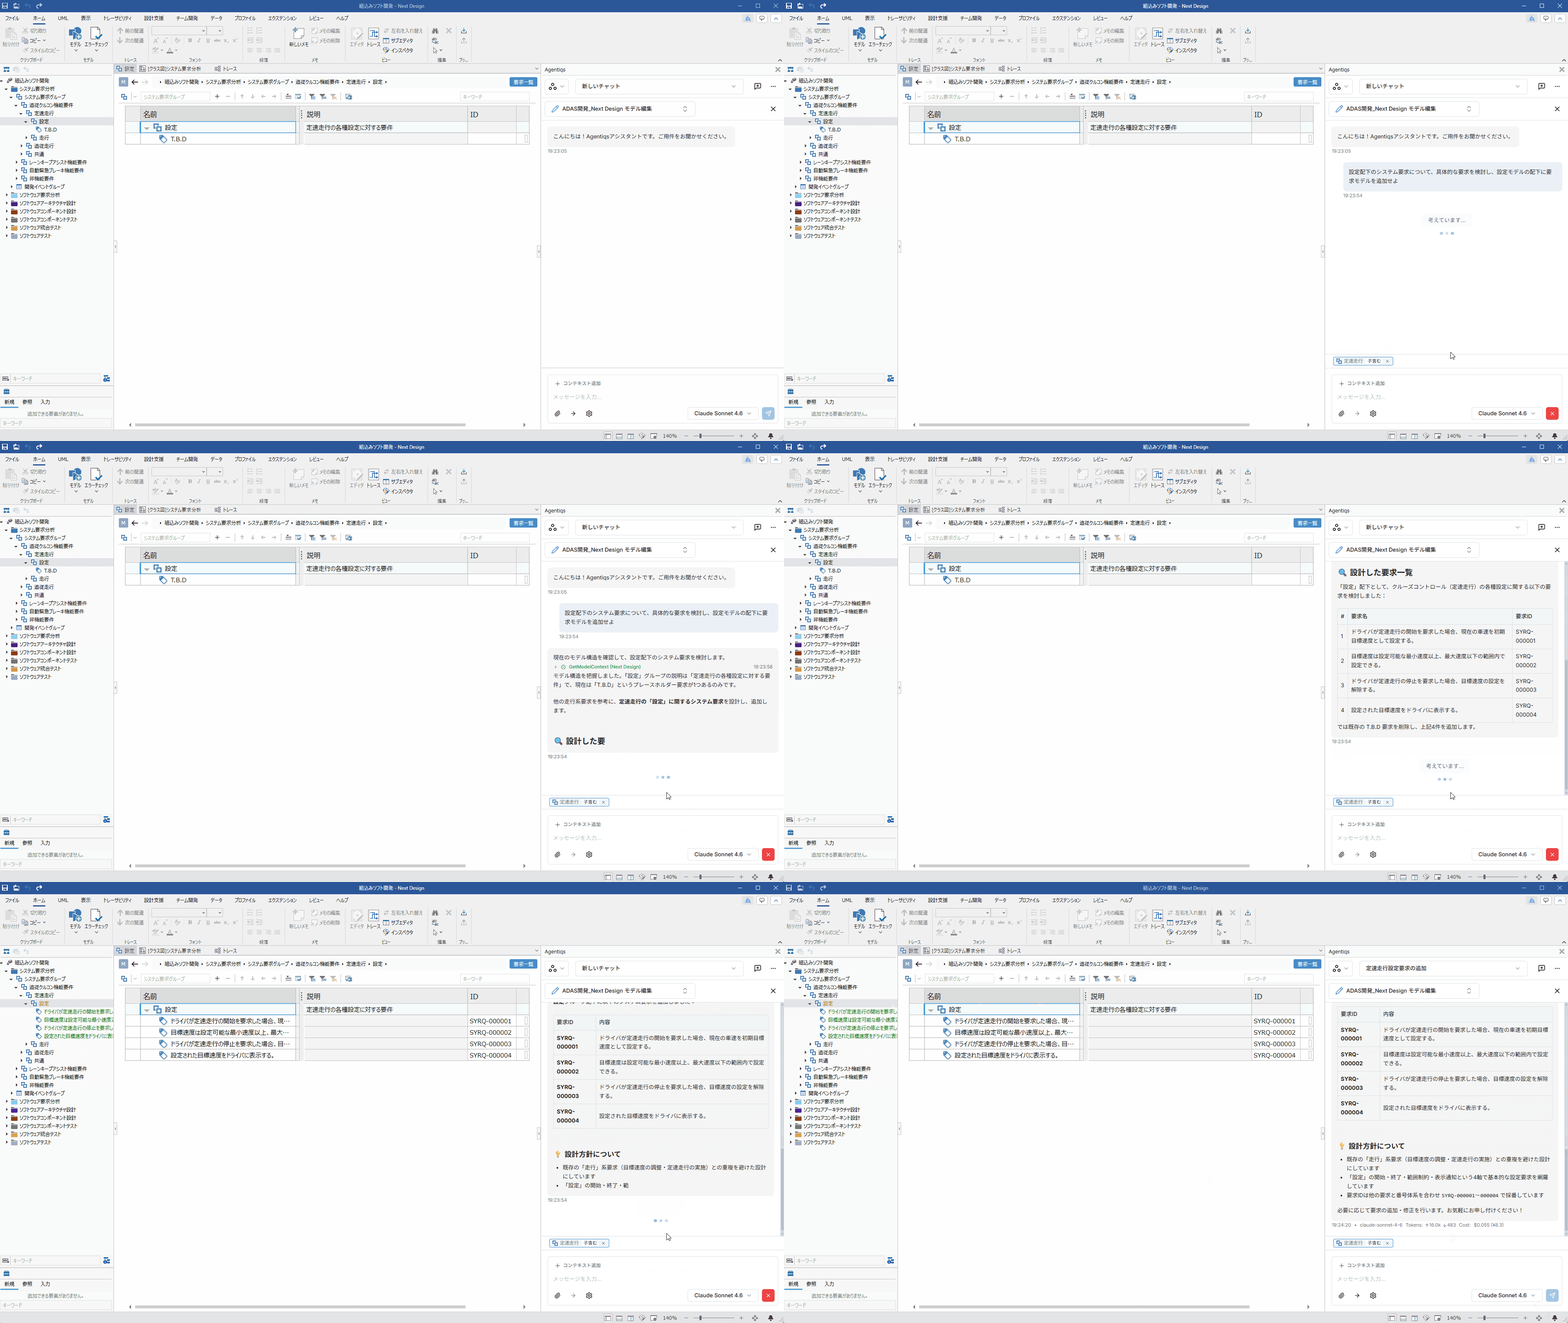
Follow the steps below to generate models.
- Select an AI agent that has the
NextDesign Model Editingtool. - Select the parent model and drag and drop it into the chat pane.
Include child elements as well by holding down
Ctrl, if necessary. - Instruct the AI agent to generate models as follows.
Message example:
For the system requirements under Settings, consider specific requirements and add requirement models under the Settings model
If you describe the structure and constraints of the models to generate in the AI agent's system prompt,
you can get more accurate results.
4. Review Across Models
Perform an AI agent review on all models under the selected model.
- In Agentiqs, select the AI agent with the NextDesign Model Editing tool that you created in step 1-1.
- While holding down
Ctrl, select the target model and drag and drop it into the chat pane. - Enter a review request message and run the AI agent.
- Message example:
Check each property in the design data, review it for omissions, and add an error to the model if neededIn this example, the sample is used to confirm that no data is missing.
- Message example:
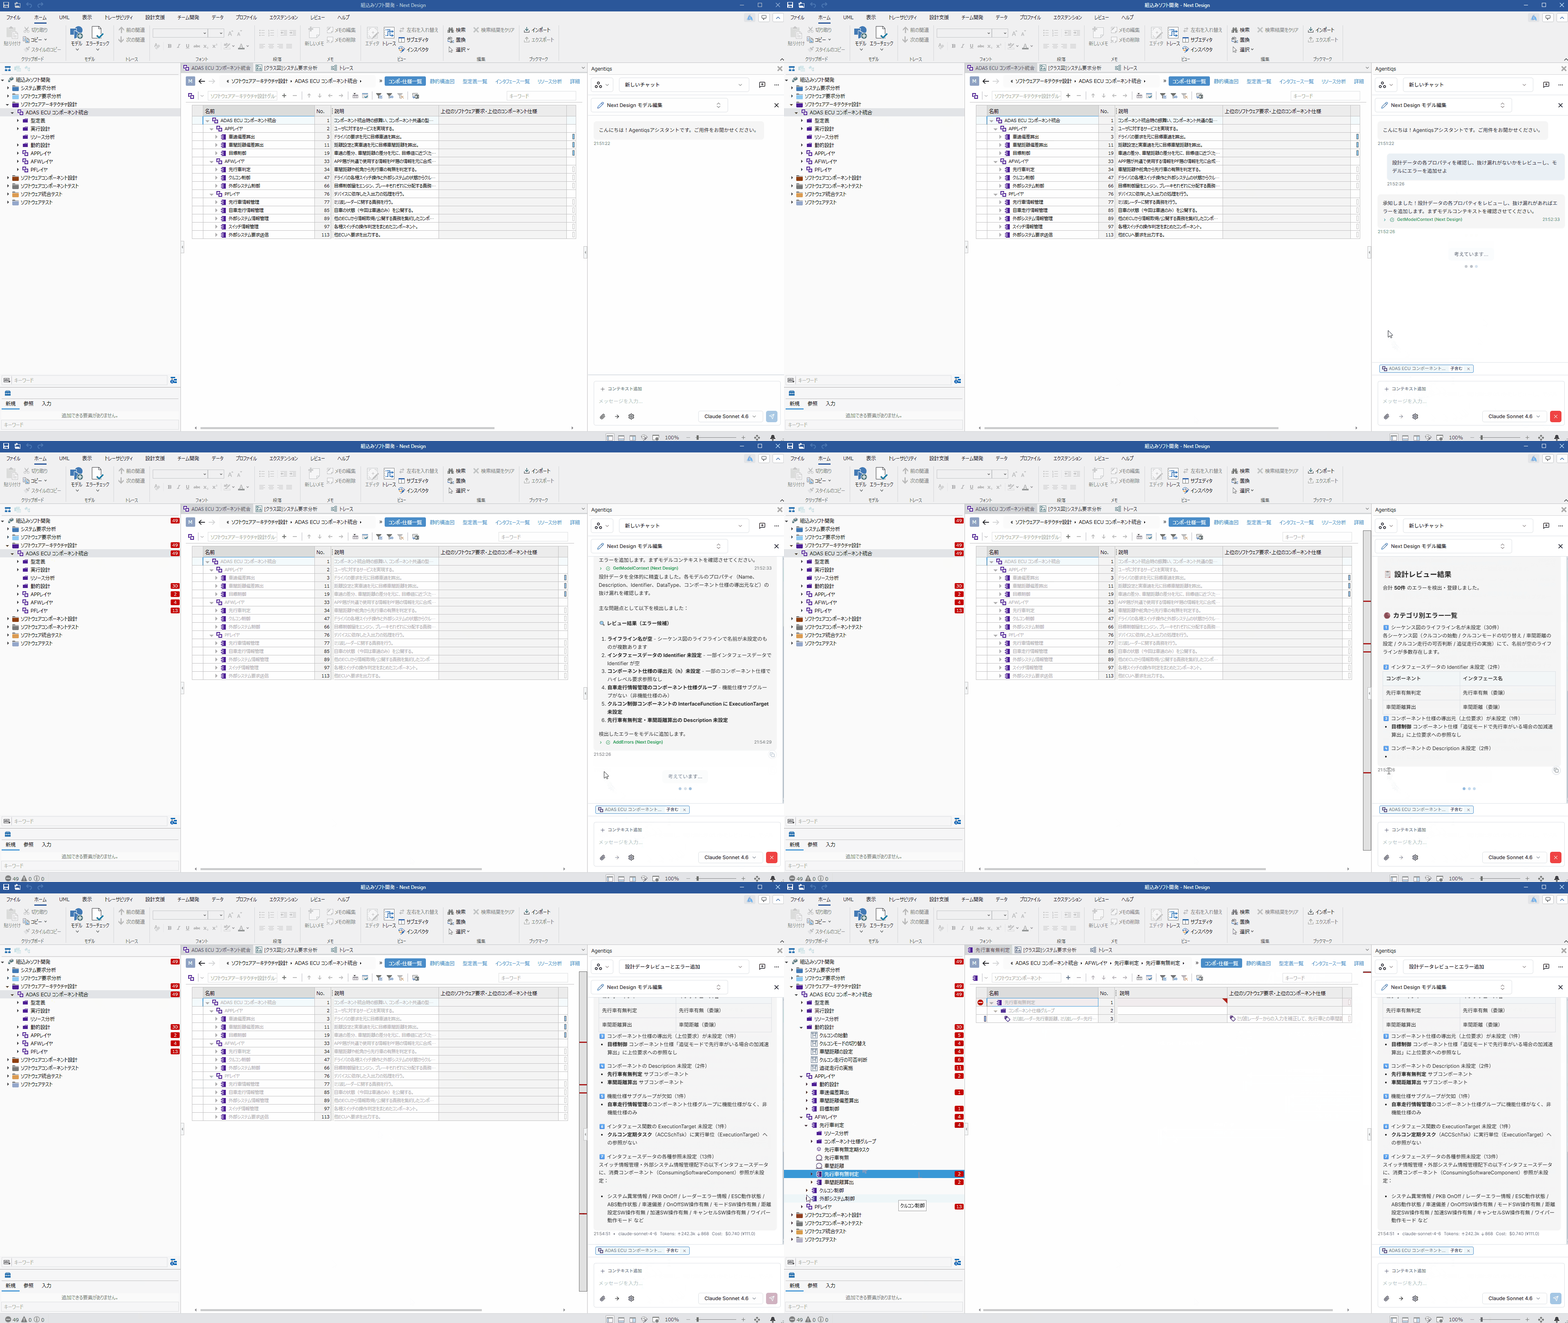
- If you use this in actual development, create a dedicated AI agent for reviews and use it to perform the review.
- If the review target is large or you want to check review points comprehensively, consider using the workflow feature.
5. Create a Metamodel
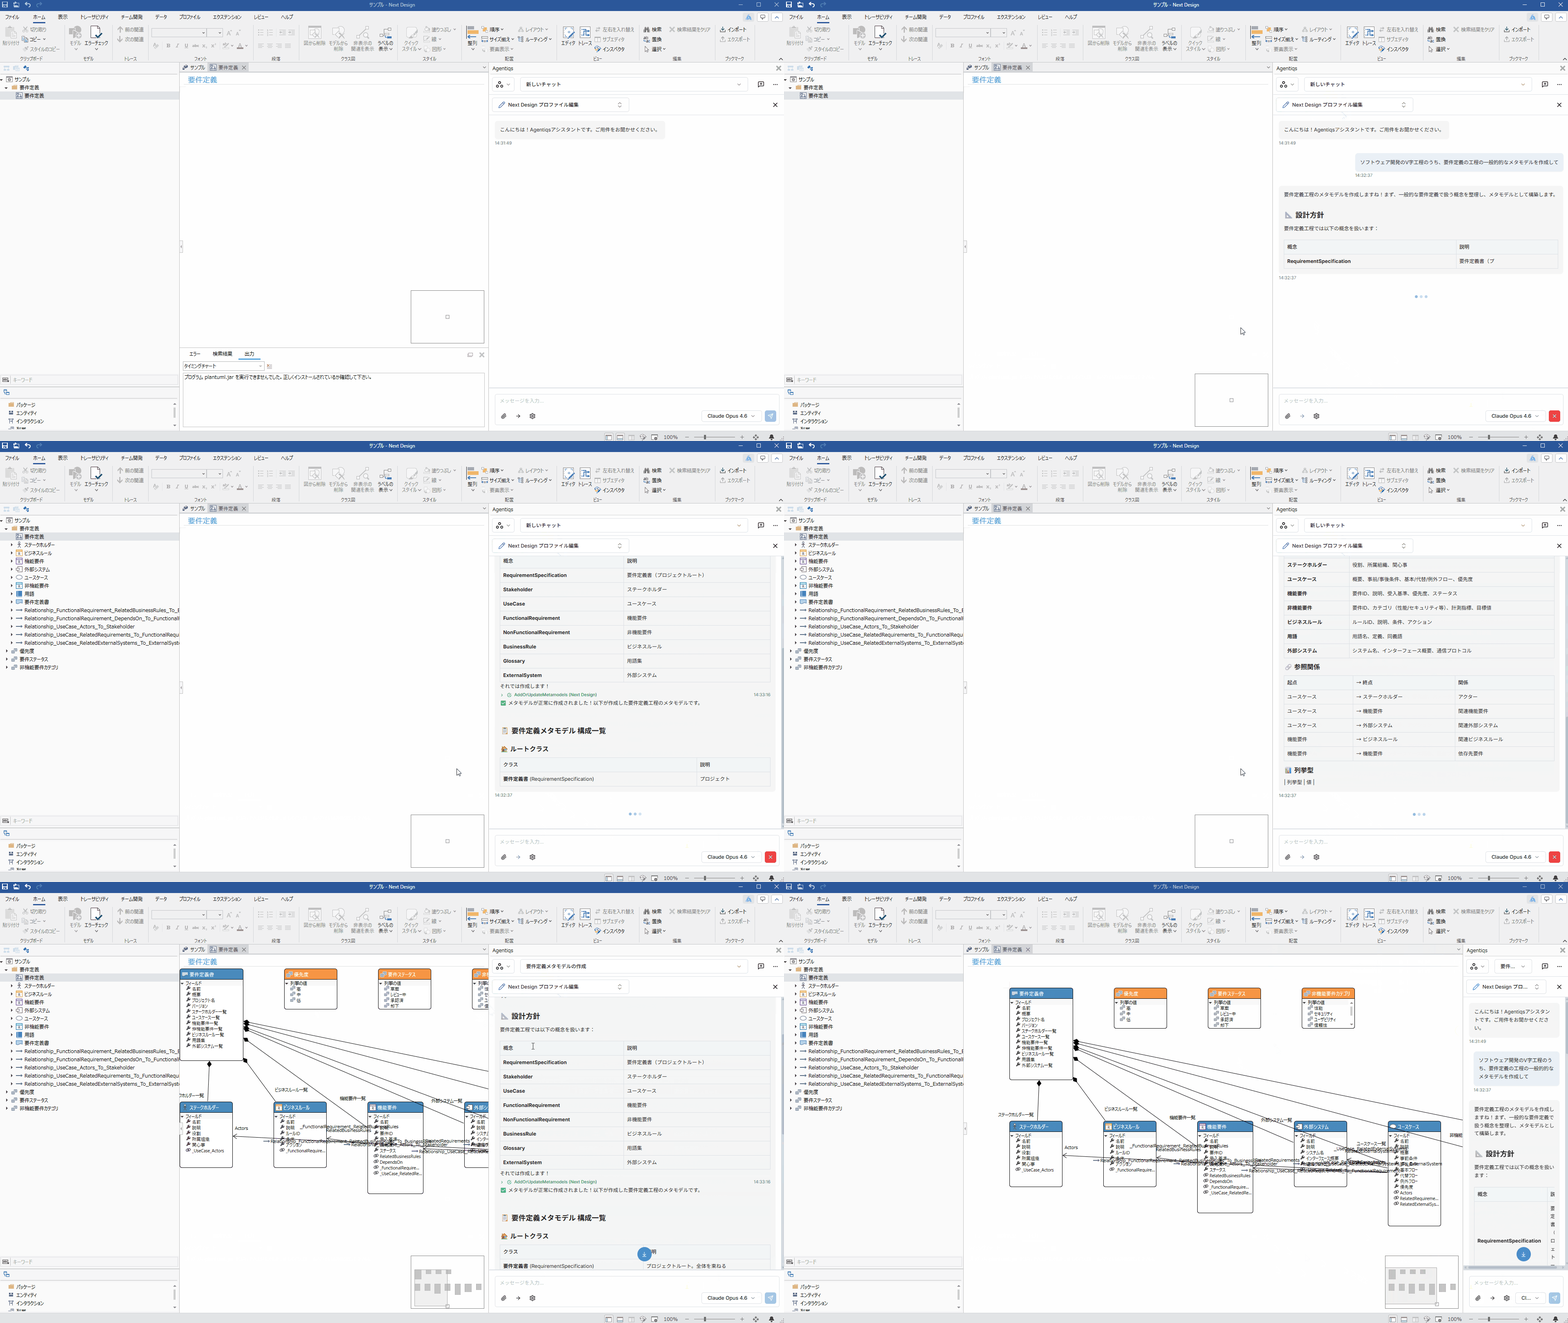
Use the profile editing screen so that the AI agent creates a metamodel.
- In NextDesign, open the profile editing screen.
- In the chat pane, select the AI agent that has the
NextDesign Profile Editingtool.What is theNextDesign Profile EditingtoolIt lets you edit and add profile structure definitions (metamodels) in a chat format.
- Instruct the AI agent about the metamodel you want to create, as shown below.
- Message example:
Create a general metamodel for the requirements definition phase in the V-model of software development
- Message example: