Sharing Settings with Your Team
This page explains common ways to share Agentiqs settings and custom items with other members.
Using Shared Workspaces
You can create a workspace that multiple members can share and use.
Creating a Workspace
This section explains how to create a workspace.
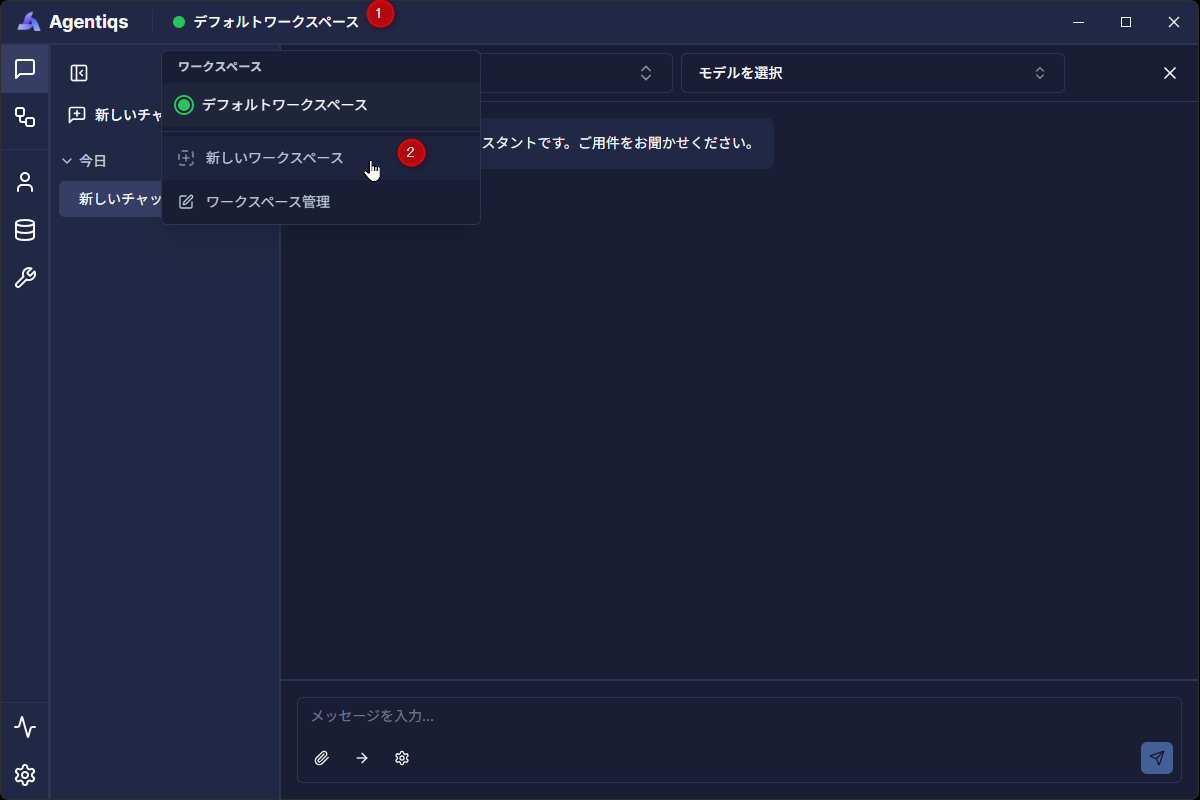
- Click [Workspace] > [New Workspace] in the title bar.
- The [Create New Workspace] dialog box appears.
- Enter a [Name] and click [Create].
- The workspace is created and applied.
- A new workspace is created in its initial state, and existing settings (agents, tools, knowledge, etc.) are not carried over automatically. If necessary, migrate them using Export Settings and Import Settings.
Reordering Workspaces
You can change the display order of workspaces in the list according to usage frequency or project priority. The order is saved per user and remains after the application is restarted. It does not affect the display order for other users.
- Open [Workspace] > [Manage Workspaces] in the title bar.
- Drag the handle on the left edge of each workspace to the desired position.
- Open the workspace switcher menu and confirm that the workspaces are displayed in the new order.
The order is saved automatically.
- The default workspace is always shown first.
- Newly created workspaces are added to the end of the list.
Sharing a Workspace
This section explains how to create and share a workspace.
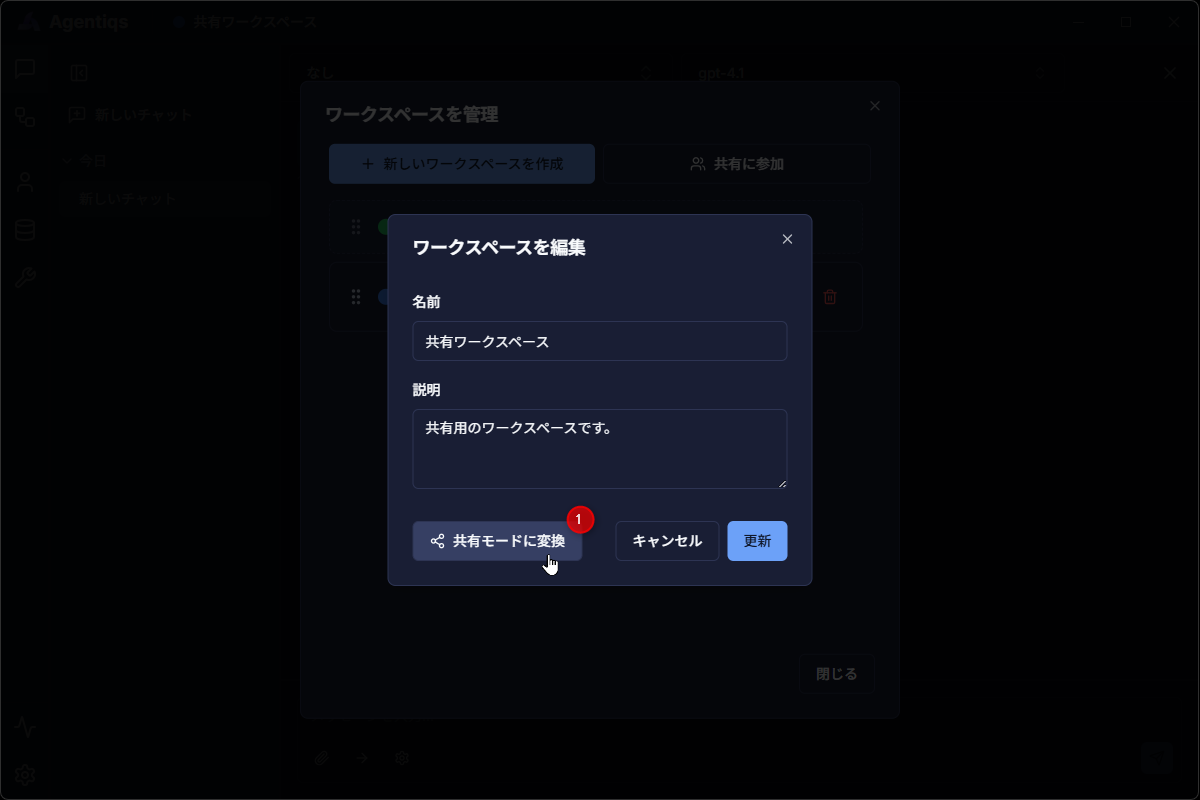
- Click [Workspace] > [Manage Workspaces] in the title bar.
- The [Manage Workspaces] dialog box appears.
- Click the [Edit] button for the workspace you want to share.
- The [Edit Workspace] dialog box appears.
- Click the [Convert to Shared Mode] button.
- The [Convert to Shared Mode] dialog box appears.
- Set the folder path to use as the shared workspace in [Shared Folder Path].
- Set a passkey if necessary, and click [Convert].
- If sharing succeeds, the
.agentiqsfolder and theworkspace.yamlfile are created in the specified [Folder Path].
- If sharing succeeds, the
- Specify a location that all members who share can access in [Shared Folder Path] (for example, Git or a network folder).
If sharing via Git, clone the repository so that the [Shared Folder Path] is the same for all members. - The passkey is required when sharing items that require encryption (such as API keys). Distribute it to members through a secure method.
- Make sure Agentiqs versions are consistent across the team using the shared workspace.
Joining a Shared Workspace
This section explains how to join a shared workspace and use the common settings provided by the team.
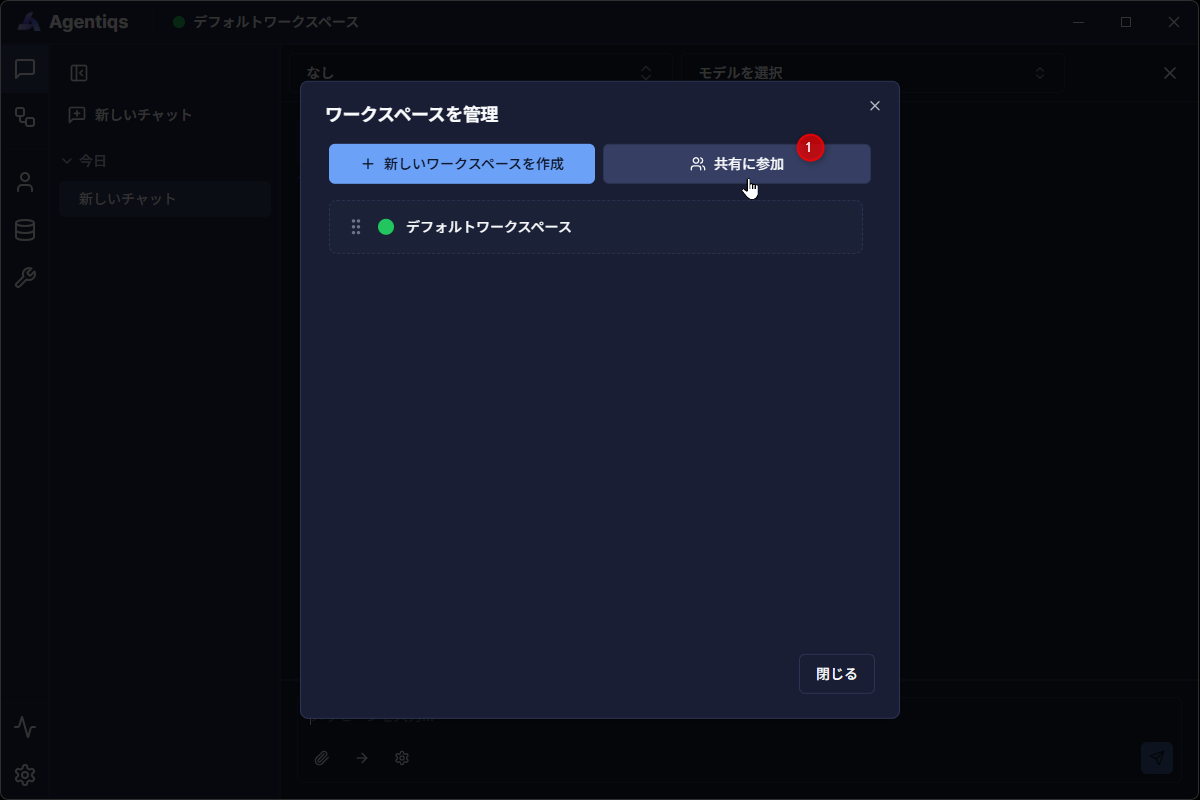
- Click [Workspace] > [Manage Workspaces] in the title bar.
- The [Manage Workspaces] dialog box appears.
- Click the [Join Shared Workspace] button.
- The [Join Shared Workspace] dialog box appears.
- Enter the [Shared Folder Path] provided by the sharing source.
- If a passkey is set by the sharing source, also enter the [Passkey].
- Click the [Join] button.
- If the join succeeds, the shared workspace is added to the list, and common agents, tools, knowledge, and other items become available.
Editing various settings in a shared workspace (AI agents, knowledge, workflows, etc.) affects all members who share it.
Example: If you set a shared folder in the workspace path, it will also overwrite the settings used by other members.
Please keep this in mind when operating the workspace.
Leaving a Shared Workspace
This section explains how to leave a shared workspace you are participating in.
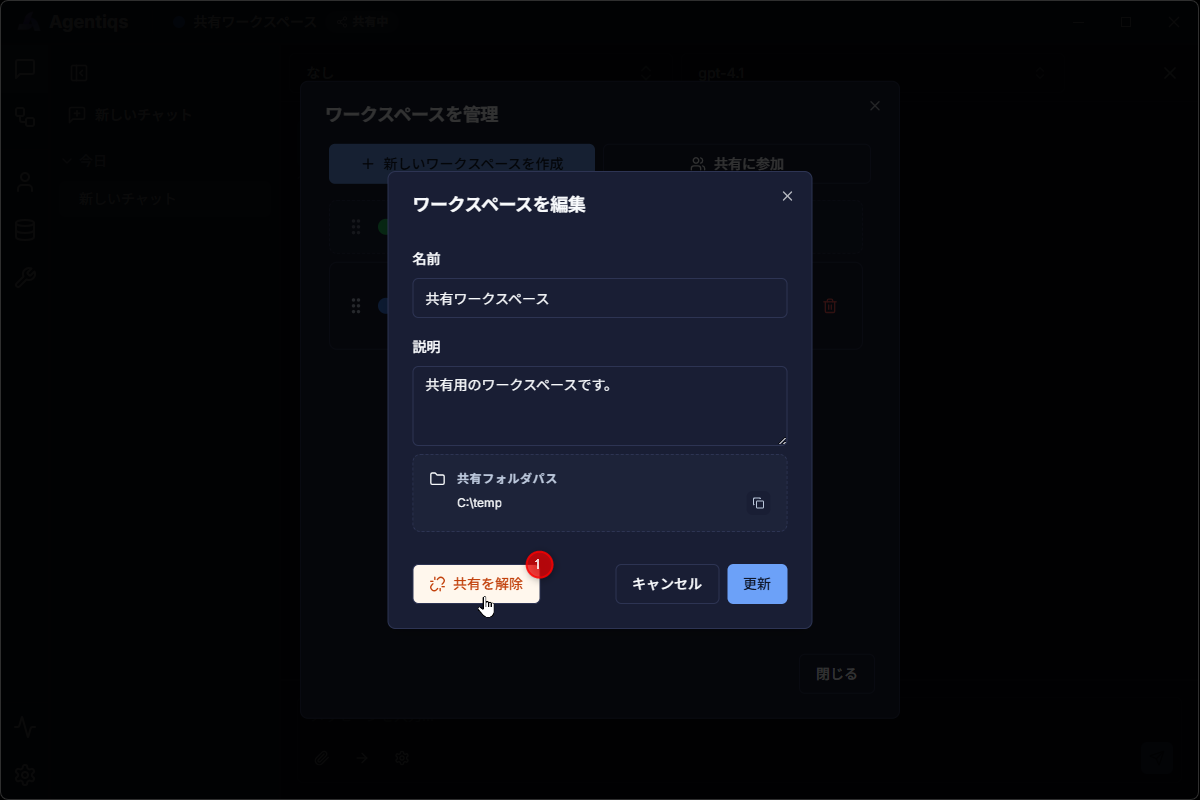
- Click [Workspace] > [Manage Workspaces] in the title bar.
- The [Manage Workspaces] dialog box appears.
- Click the [Edit] button for the shared workspace.
- The [Edit Workspace] dialog box appears.
- Click [Unshare].
- Workspace sharing is removed, and it becomes a personal workspace.
- When you leave a shared workspace, the state of the workspace at that time is duplicated into your personal settings. Please note that changes made afterward by other users to the shared workspace settings will not be reflected in your personal workspace.
Sharing Knowledge
You can publish the knowledge you create so that other members can use it, or import published knowledge into your own workspace for use.
Publishing Knowledge
This section explains the procedure for publishing knowledge so that other members can access it.
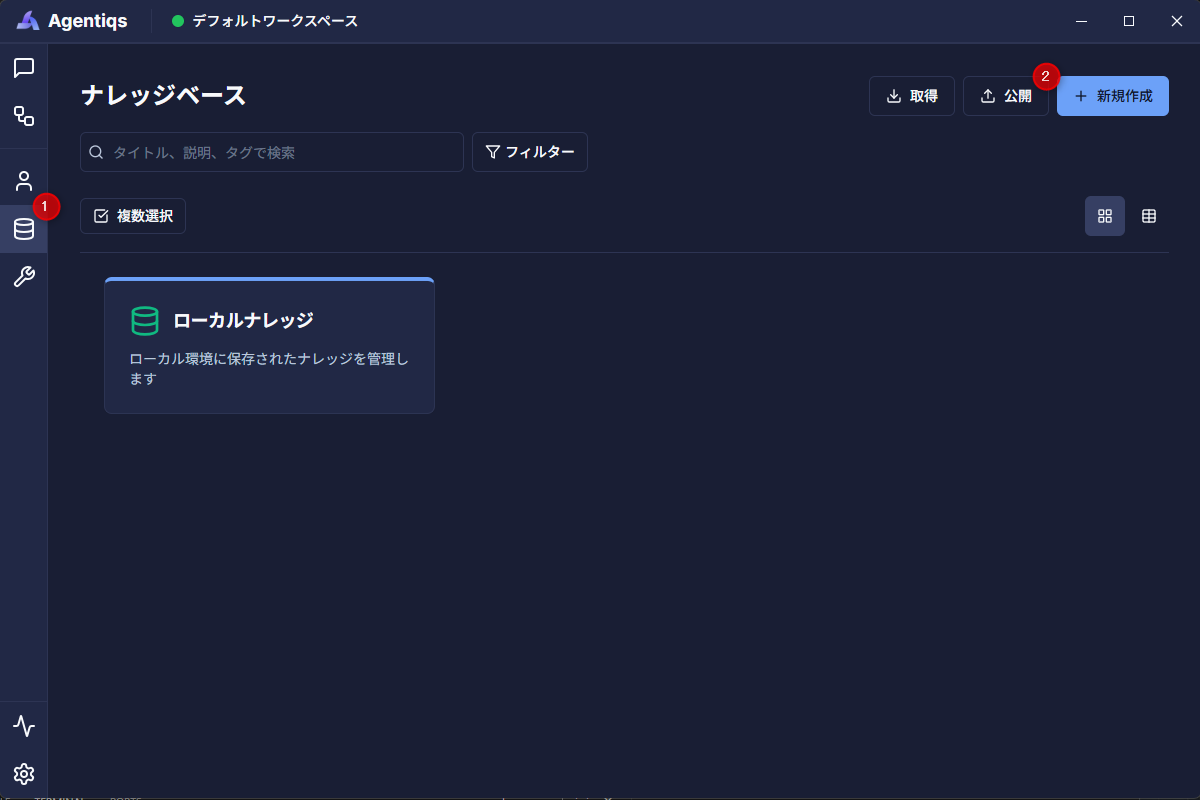
- Click [Knowledge] > [Publish].
- The [Publish Knowledge] dialog box appears.
- Select the knowledge you want to publish and click [Next].
- Enter the destination folder in [Publication Destination] and click [Next].
- Information about the knowledge to be published is displayed.
- If the information is correct, click [Publish].
- For knowledge containing confidential or personal information, or other information with handling restrictions, determine the scope of publication according to your organization's rules.
Obtaining Knowledge
This section explains how to obtain published knowledge and use it in your workspace.
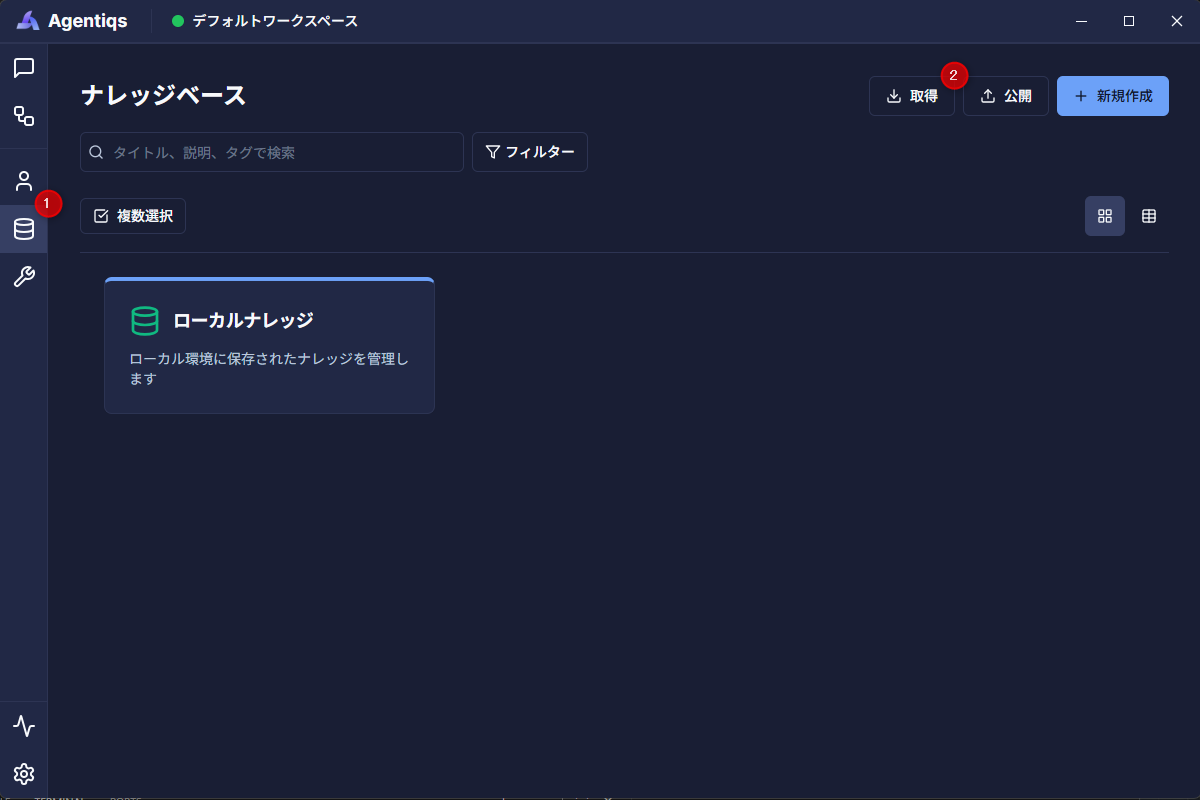
- Click [Knowledge] > [Get].
- The [Get Knowledge] dialog box appears.
- Enter the published folder of the knowledge you want to obtain in [Source] and click [Explore available knowledge].
- A list of knowledge published in the source folder is displayed.
- Select the knowledge you want to obtain and click [Next].
- Information about the knowledge to be obtained is displayed.
- If the information is correct, execute [Get].
- The obtained knowledge is added to the knowledge list.
- If [Automatic Acquisition] is enabled for acquired knowledge, the knowledge is updated regularly.
Also, if you change the settings for acquired knowledge while [Automatic Acquisition] is enabled, the information in the published knowledge may be updated. Please be careful when changing settings for knowledge other than the one you published.
Using Organization Shared Settings
If you register organization-wide settings distributed by the administrator in a shared folder and encrypted with a passkey (such as AI providers and proxies) as references, subsequent setting changes are applied automatically.
Unlike sharing personal settings, once registered, the latest state is continuously synchronized.
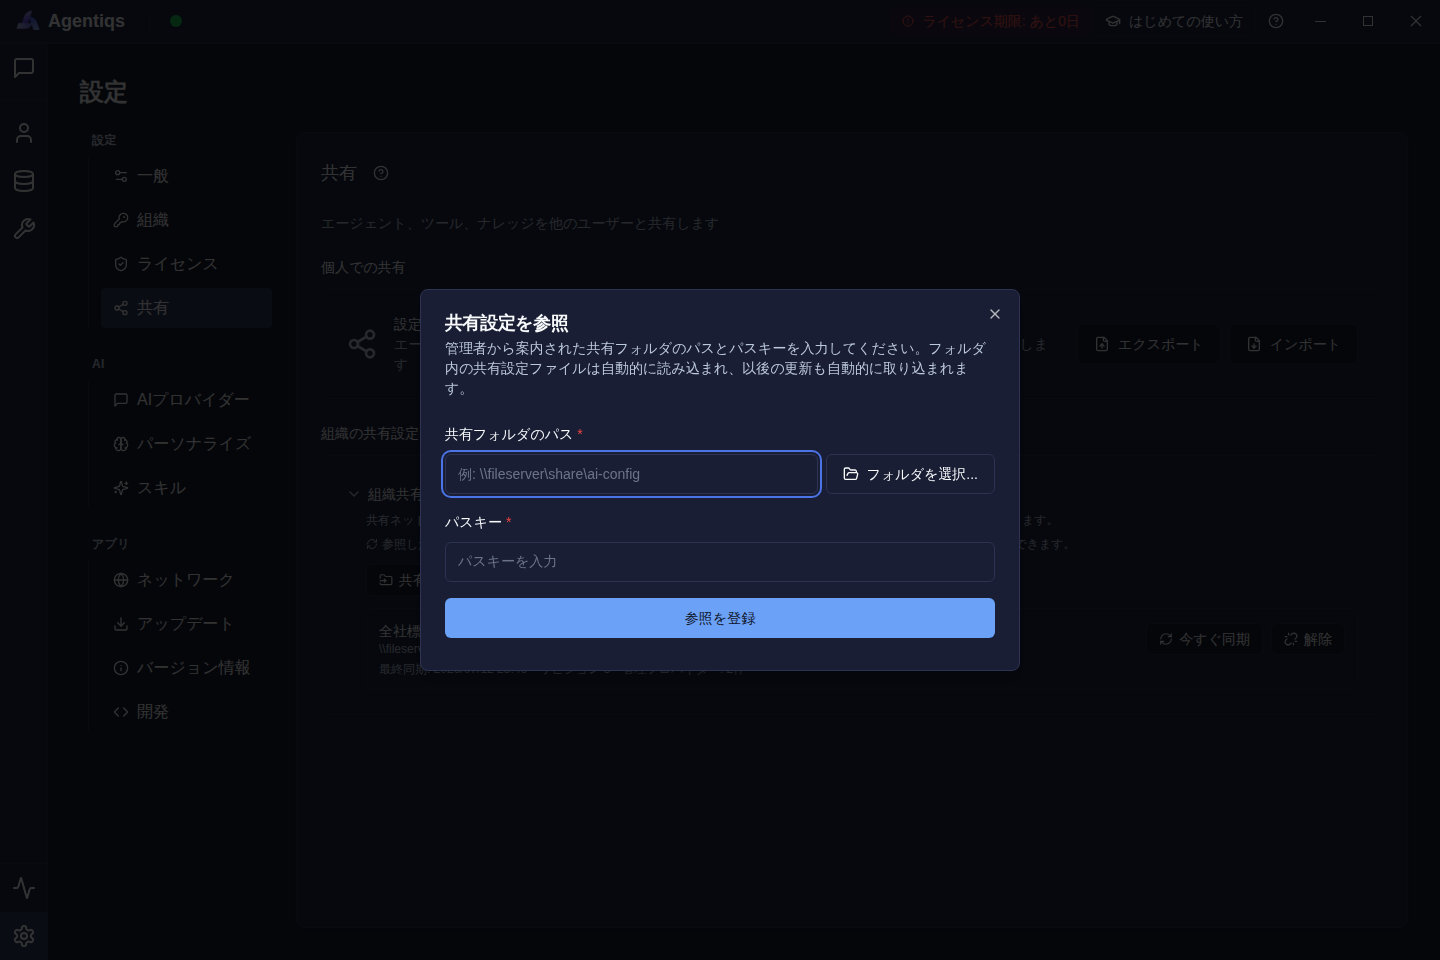
- Click [Settings] > [Sharing] > [Reference Shared Settings].
- Enter the shared folder path and passkey provided by the administrator, then register them. Afterward, updates are applied automatically. If you want to apply them immediately, use [Sync Now].
- Automatic updates run when the application starts and approximately every 10 minutes thereafter.
- If the shared settings include proxy settings, they are synchronized to the shared organization settings each time. Any individually configured proxy settings are overwritten.
- AI providers and models you created yourself are not deleted by this synchronization.
Sharing Personal Settings
You can share your personal custom settings in Agentiqs (AI agents, knowledge, etc.).
Exporting Settings
This section explains the procedure for exporting your personal custom settings in Agentiqs.
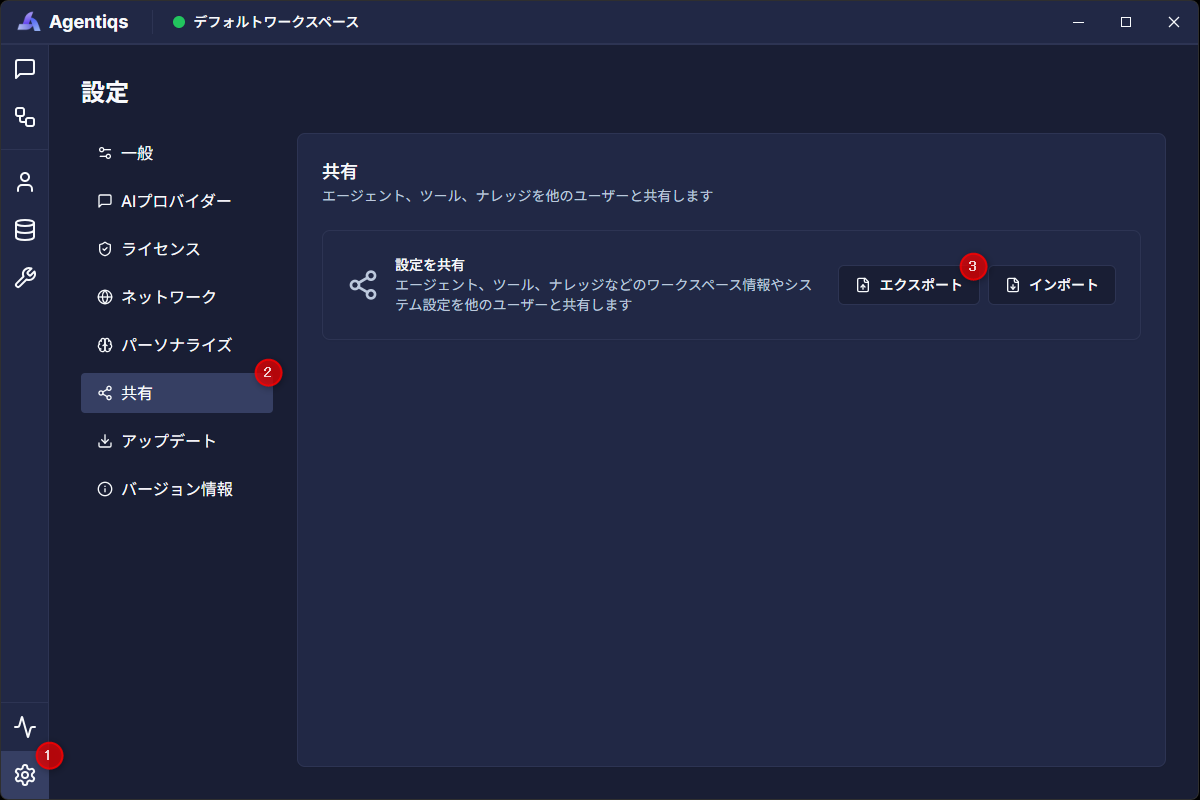
- Click [Settings] > [Sharing] > [Share Settings] > [Export].
- The [Export Settings] dialog box appears.
- Select the items you want to export and enable the checkboxes.
- Enter any passkey and click [Generate Export Data].
- The passkey and export data are generated and displayed on the screen.
- Click [Download] to save the export data as a file.
- Share the saved export data file and passkey with the recipient.
- System
- AI Provider
- Proxy
- Workspace
- Agent
- Tools
- Knowledge
- Workflow
- For security reasons, we recommend distributing the export data and passkey through different channels.
- Only the settings of the currently active workspace can be shared. If you want to share the settings of a different workspace, switch workspaces first.
Importing Settings
This section explains how to import your personal custom settings in Agentiqs.
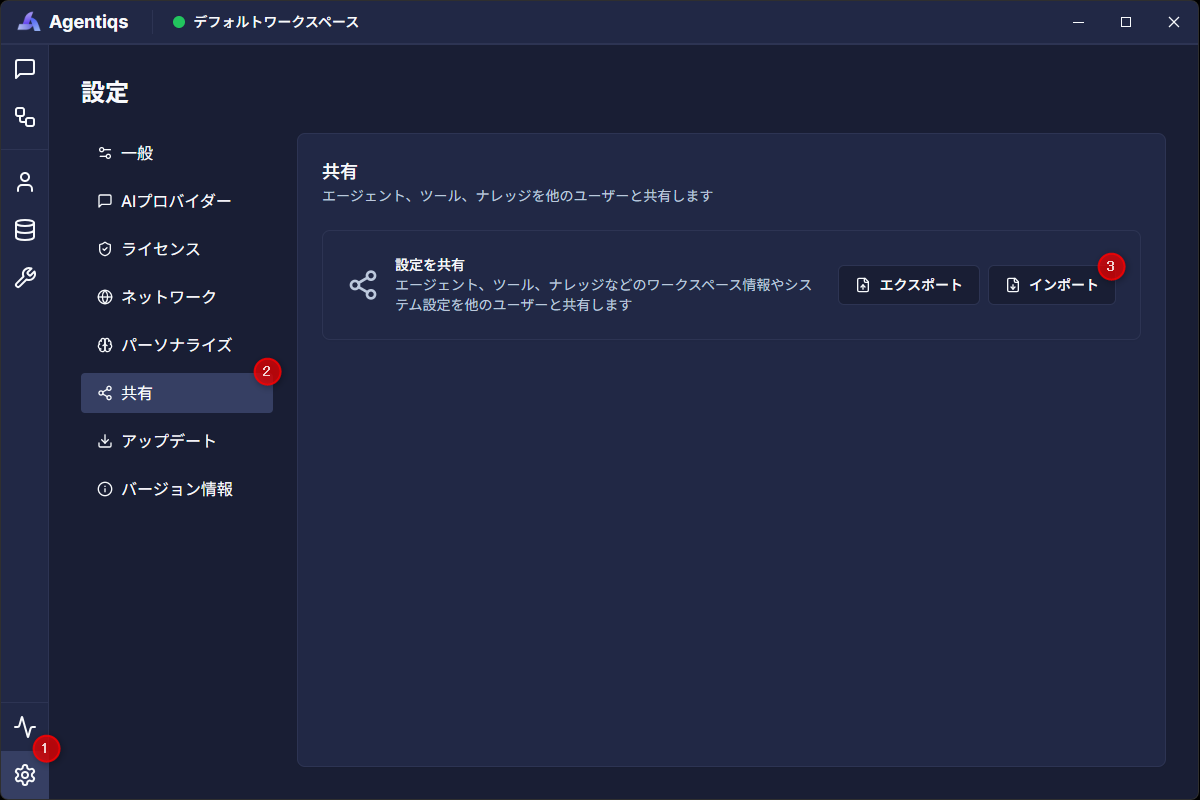
- Click [Settings] > [Sharing] > [Import].
- The [Import Settings] dialog box appears.
- Enter the following exported data received from the other party:
- Passkey
- Export Data
- Perform the import.
- If the settings are imported successfully, the import results are displayed.
- If the imported data (knowledge, tools, etc.) settings contain absolute paths, they may not function correctly if the same path does not exist on the destination PC.
- If possible, standardize the paths to relative paths (or paths that are the same for all members) before exporting.
- After importing, confirm that the paths for each imported setting are correct in the destination environment.
- If you imported knowledge, run [Index Update] after importing.
- If you do not run an index update, search results and references for knowledge may not be updated.